• Skip to primary navigation
  • Skip to main content
  • Skip to primary sidebar

GB Personal Training Ltd

Health, Fitness & Wellbeing

  • Workouts
  • About
  • Blog

Top 3 Bodyweight Exercises

By Greg Brookes

Top 3 Bodyweight Exercises

I’m a huge believer in simplicity. Keeping exercise and workouts simple is vital for success. Nothing is more demotivating than a complex workout with lots of confusing exercises.

Recently I’ve been experimenting with one exercise per day bodyweight workouts and my ‘How to Perform 100 Push Ups‘ is a good example of this.

Push Ups are great and so are many other bodyweight exercises but it’s important to choose exercises that target the whole body, this way you avoid muscle imbalances, postural problems are also increase your fat burning potential more efficiently.

So I asked myself a simple question:

“What would be the minimum amount of bodyweight exercises I could use to target the whole body effectively?”

The answer produced the title of this blog post: Top 3 Bodyweight Exercises

OK, lets not waste any more time and get straight into the 3 exercises…


Bodyweight Exercise # 1 – Inverted Rows

The inverted row is a highly underused exercise, in fact I rarely see anyone performing this exercise in a gym when I’ve been training.

I chose this exercise because:

  1. It works the posture muscles at the back of the body and counteracts sitting
  2. It works most of the pulling muscles in the body
  3. It’s the exact opposite of a Push Up
  4. It integrates all your core muscles beautiful
  5. It improves scapula retraction

How it’s done

You lie underneath a bar and keeping your body in line from shoulder to heel you pull your chest up towards the bar. It is important to keep your body straight by activating your core muscles. The more parallel your body is during the movement the more difficult the exercise will be.

My Inverted Row Tips:

  • Always keep your core engaged and body in a straight line
  • Never let your hips sag
  • Pull your sternum to the bar
  • Never reach with your chin keep it neutral
  • Breathe in as your pull up to the bar and out as you lower
  • Use a tempo of 2 seconds up and 2 seconds lower
  • Never use wrist straps let your grip improve naturally

Beginners

Start with the bar high and lower the bar each time you can perform 12 good quality repetitions.

Intermediate

Continue to lower the bar until your back almost touches the floor on the downward part of the movement. Once you can perform 12 good repetitions at this height raise the bar again and place your feet on a bench.

Advanced

Once you can perform 12 good repetitions with your feet on a bench and the bar as low as you can go without your back touching the floor advance to instability exercises. For instability exercises try using just one leg on the bench or swapping the bench for a stability ball. Once you can perform 12 good repetitions of these try using a TRX or Suspension Straps. You can even try one arm rows as you get really strong.

Performing these at Home?

If you are working out at home then chances are you won’t have an adjustable bar in your house. You can still perform inverted rows by lying underneath a table and pulling yourself up to the underside. Just be careful if you use this method that your table is strong enough and doesn’t tip over.


Bodyweight Exercise # 2 – Push Ups

Push Up Exercise

Everyone knows the Push Up and how effective they can be. Performing proper Push Ups is not as easy as you think and I would advise everyone to take a look at the tutorial video below to get it right. If you want to find out more about training your Push Ups then please see my 100 Push Ups Article

I chose this exercise because:

  1. It works most of the Pushing Muscles in the Body
  2. It’s the complete opposite of the Inverted Row
  3. It perfectly integrates the core muscles and strengthens the Abs
  4. It improve shoulder stability

How its Done

Face down with weight on hands and toes lower and Push Up the body keeping the body in perfect alignment from shoulder to heels. Most people will find they are weak in the core and sag at the hips, if this starts to happen stop the exercise.

My Push Ups Tips:

  • Keep the Core engaged throughout the exercise and the body in a straight line
  • Breathe In on the way down and Out on the way up
  • Ensure that the elbows bend backwards and NOT outwards
  • Contract the buttocks to stabilise the core
  • Descend down until your elbow forms a 90 degree angle
  • Pull yourself down into the exercise by rotating the arms inwards as you descend

Here’s my Complete Push Up Tutorial Video

Beginners

If a proper Push Up is too much for you then start by doing Push Ups against a wall, when you can perform 20 repetitions move on to your hands on a table or chair.

Intermediate

You are performing proper push ups. Practice different hand widths, closer will be more difficult. Also try one foot on top of the other one or tapping your opposite shoulder after each repetition.

Advanced

Practice more strength based Push Ups by raising your feet on a chair or bench. Try improving your shoulder stability by performing them with your hands on an exercise ball. Develop explosive power with clap push ups.

Have trouble with your Wrists?

Many people suffer with there wrists when doing Push Ups. If this is the case for you then try either using Push Up bars or performing the Push Ups off your knuckles (use a mat to cushion them).


Bodyweight Exercise # 3 – Pistol Squats

Kettlebell Pistol Squat Exercise

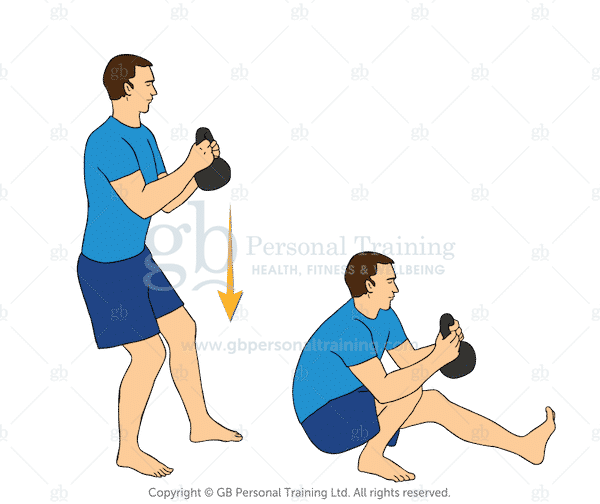
Pistols are an advanced exercise that combine the elements of both a lunge and a squat together. Not only will this exercise work the entire lower body but it will elevate your heart rate rapidly as well as improving your one legged strength and stability.

I chose this exercise because:

  1. It works all muscle of the legs and lower body
  2. It improves balance and single leg stability of the hip helping protect the knees
  3. It beautifully integrates the core and back muscles
  4. It’s hugely cardiovascular
  5. It works hip and trunk mobility often in decline due to excess sitting

How it’s Done

Standing on one leg with the other leg held above the floor. You then sit back onto your heel and drop down into a one legged squat. Next you drive back up to the standing position. At no point does the the one leg touch the floor.

My Pistol Squat Tips:

  • Keep your weight back on your heel at all times
  • Lower your body slowly keeping your knee in straight alignment
  • Keep your arms and weight forwards to counteract the movement
  • Never let your heel come off the floor
  • Breathe IN on the way down and breathe OUT through pursed lips as you stand

Here a Quick Video of the Pistol Squat

Beginners

The pistol Squat is a very tough exercise, the beginner should first master the basic lunge exercise, the basic squat exercise and finally the Bulgarian lunge which simply elevates the back foot during a static lunge.

Intermediate

Once your Squats and Lunges are strong then you can practice the lowering part of the Pistol onto a chair. Lower slowly down on one leg until your thigh is parallel with the floor. The chair can then take your weight and you can stand with both feet. You can also practice the pistol squat by using a chair, pole or strap to hold onto. Work up to 12 repetitions per leg.

Advanced

If you can perform the pistol squat for 12 reps with assistance then it’s time to go for it. You may find holding a weight in front of you helps as a counter balance. My rolling version of the Pistol Squat is also another way to practice this movement.

Here’s a Video of the Rolling Squat

Once you have the Pistol Squat perfected work on adding load to the squats either by wearing a weight vest, holding dumbbells or kettlebells.

Problems with the other leg?

For many people holding the other leg off the ground can be a problem. In this situation you may need to work on your hip mobility. Practice spending time in the bottom position of the squat and opening up your hips, you can hold onto a post for support if needed.

To continue to develop strength while your hip mobility improves you can practice your pistols by standing on a box and letting your free leg hang over the side. Using this method allows the free leg to not touch the floor as you squat down.


Putting it all Together into a Workout

Now you understand my Top 3 Bodyweight Exercises you can now work on putting them into a workout.

There are 2 basic options that I have used successfully:

Workout # 1 – (One Exercise per Day):

You chose one exercise per day, for example:

  • Monday: Inverted Row (12 reps, 60-90 sec rest, 3-5 sets)
  • Tuesday: Pistol Squats (6 reps each, 60-90 sec rest, 3-5 sets)
  • Wednesday: Push Ups (12 reps, 60-90 sec rest, 3-5 sets)
  • Thursday: Inverted Row (12 reps, 60-90 sec rest, 3-5 sets)
  • Friday: Pistols Squats (6 reps each, 60-90 sec rest, 3-5 sets)
  • Saturday: Push Ups (12 reps, 60-90 sec rest, 3-5 sets)
  • Sunday: Rest

Workout # 2 –  (3 Exercises per Day):

Here you perform all the exercises in one day but you have more days off:

  • Monday: Inverted Row (12 reps), Pistol Squats (6 reps each), Push Ups (12 reps), Rest 60-90 sec rest, Repeat 3-5 sets
  • Tuesday: Rest
  • Wednesday: As Monday
  • Thursday: Rest
  • Friday: As Monday
  • Saturday & Sunday: Rest

Workout 1 is going to be a lot easier and allows for more focus on just one exercise. It will however overload that exercise each day so you will get strong fast this way. You also only perform each exercise 2 x per week compared to 3 x with Workout 2.

Workout 2 will be more cardiovascular as you perform more exercise and target more muscle groups per workout. So I would chose this option more for general fitness and fat loss. You also have 4 full days off for total body recovery.

With both of these workouts you will want to work through your progressions so start at whatever level you feel comfortable (Beginner, Intermediate, Advanced) and look at improving over the weeks, not days!. Most importantly keep the quality of each exercise high and NEVER sacrifice numbers for quality.


Have you tried any of these bodyweight exercises? Let me know more below:

Top 5 Bodyweight Exercises for Interval Training

By Greg Brookes

Top 5 Bodyweight Exercises for Interval Training

When many people think about Interval Training they think about running but there are other options.

Using bodyweight exercises is another way to elevate your heart rate and if done correctly you can get many other benefits too like:

  • Full Body Muscle Development and Activation
  • Injury Prevention through Core and Joint Stability
  • Limited Overuse Injury through Better Load Distribution
  • Improved Balance and Coordination
  • Optimal Mobility and Flexibility of Joints

In order to get the correct response from these intervals it is important to use Bodyweight Compound exercises, that means exercises that use as many joints and muscles as possible.

You will find all these exercises demanding so the idea is to work hard for a short period and then rest for a short time before repeating the exercise.

To get a better understanding of interval training and the philosophy behind this type of exercise please read my article ‘Complete Guide to Interval Training for Quicker Results‘


Top 5 Bodyweight Exercises for Interval Training

# 1 – Fast Mountain Climbers

Fast Mountain Climbers for Cardio

A fast paced exercise that uses most muscles in the body. I particularly like this exercise because it works your core stability hard as you try to maintain alignment in the push up position. You will need good shoulder stability and the ability to hold a good push up position in order to get the most from this exercise. From a push up position you keep the core tight as you alternatively drive the knees up and between the arms.

Be aware that this exercise heavily utilises the hip flexors, the muscles that bring the knees to the chest. It is common for many people to have over-active hip flexors due to faulty core activation so you will want to work on stretching out your hip flexors with deep lunges and back bends to counteract this over time.

Greg’s Tip: Get yourself some Sliders for this exercise or try it on a wooden floor wearing some old socks. Using sliders will eliminate the need for impact during each repetition so its a better option for beginners.

Tutorial on How to perform the Fast Mountain Climber Exercise:

3 Bodyweight Workouts:

  • Fast Mountain Climbers x 20 seconds
  • Rest 10 seconds and repeat 4-8 times
  • Fast Mountain Climbers x 30 seconds
  • Front Plank x 30 seconds
  • Repeat 3-8 times
  • Fast Mountain Climbers x 30 seconds
  • Squats x 30 seconds
  • Rest 30 seconds and repeat 3-8 times

# 2 – High Knees

High Knees Cardio Exercise

This is a standing exercise that will have your heart rate shoot up very quickly indeed. Like all these exercises it works most muscles in the body but this particular exercise works into the Core Rotational muscles as well as the legs.

The exercise is very simple just run on the spot lifting the knees as high as possible. Your optimum goal is to get the knees above waist height.

Be very careful with this exercises because it uses a lot of high impact through the calf muscles. Please ensure that the ankles and calf muscles are warmed up first and that you have no calf or Achilles issues. This exercise would not be recommend for beginners or those who carry too much excess weight as the impact would be too high. Fast Mountain Climbers with Sliders would be more appropriate for a beginner.

Greg’s Tip: place your hands at waist height and work hard to slap your hands with your knee for each repetition.

Tutorial on How to Perform the High Knees Exercise:

3 Bodyweight Workouts:

  • High Knees x 20 seconds
  • Rest 10 seconds and repeat 3-8 times
  • High Knees x 100 reps
  • Rest 60 seconds and Repeat 3-8 times
  • Push Ups x 10, 9, 8 etc
  • High Knees x 30 seconds
  • Countdown, 10 Push Ups then High Knees, 9 Push Ups High Knees etc

# 3 – Squats or Jump Squats

Jump Squats Cardio Exercise

Nothing is more practical than working on the Squat exercise and if done correctly and at a good pace they are very cardiovascular too. Squats use most muscles of the body but in particular the legs and buttocks.

For the beginner regular squats will raise the heart rate rapidly but for the more advanced you may need to up the tempo or add in a jump. Jump squats are definitely not for the beginner so if you are new to squats work on your regular squats first.

If you are not getting as much from your squats as you think you should you are probably not squatting low enough and/or driving your hips to full extension at the top of the movement.

Greg’s Tip: Get down deeper. For beginners squat down to a chair, stool or bench that puts your thighs at least to parallel with the floor.

Tutorial on How to Perform the Jump Squat Exercise:

3 Bodyweight Workouts:

  • Squat or Jump Squats – 20 seconds
  • Hold in bottom squat position – 10 seconds
  • Repeat 5-8 times
  • Squat or Jump Squat – 20, 18, 16, 14, 12, 10 reps
  • Fast Mountain Climbers – 20 seconds
  • Countdown, Squat 20, Fast Mountain Climbers, Squat 18, Fast Mountain Climbers etc.
  • Squat or Jump Squat x 20 reps
  • High Knees x 20 reps
  • Repeat 5 times as quickly as possible

# 4 – Squat Thrusts

Squat Thrusts Cardio Exercise

Similar to the Fast Mountain Climber more even more demanding and placing more emphasis on the leg muscles. Squat thrusts are a huge core exercise too!

Beginners should reduce the impact of the Squat thrust by limiting the length of the jump or my using Sliders or socks on a wooden floor.

Try to keep your weight over the hands as much as possible as this takes the emphasis away from the legs slightly. Ensure that you extend the legs fully during each repetition.

Greg’s Tip: Use a line on the floor or use some tape to create one. Next ensure you jump your feet over the line each time. As you improve place the line closer and closer to the hands.

How to Perform the Squat Thrust Exercise:

3 Bodyweight Workouts

  • Squat Thrusts – 20 seconds
  • Rest 10 seconds and Repeat 3-8 times
  • Squat Thrusts – 30 seconds
  • Pull Ups x 1,2,3,4
  • Ladder, Squat Thrusts then 1 Pull Up, Squat Thrust, 2 Pull Ups, See how high you can go
  • Squat Thrusts – 50 reps
  • Rest 60 seconds
  • Repeat 40 reps, Rest, 30 reps, Rest, 20 reps, Rest 10 reps

# 5 – Burpees

Burpee Cardio Exercise

The classic burpee just had to be included in this list. For the beginner just performing 5-10 good Burpees can be very cardiovascular. Like the exercises above the Burpee uses most muscles in the body. You can modify the exercise to eliminate the jumping aspect if you are new to the exercise and you can increase the demand by adding in a jump at the top of the exercise. Good core stability is essential for this exercise especially during the jumping back of the feet.

Greg’s Tip: Make you you don’t just fall to the floor, perform a good squat and then place the hands down. The downward phase is an important part of the exercise.

How to Perform the Burpee Exercise:

3 Burpee Workouts

  • Burpee x 10 reps
  • Rest 60 seconds and Repeat 3-8 times
  • Burpee with 2 Push Ups x 10 reps
  • High Knees x 50 reps
  • Repeat 3-8 times
  • Burpee x 30 seconds
  • High Knees x 30 second
  • Rest 30 seconds
  • Squats or Jump Squats x 30 seconds
  • Fast Mountain Climber x 30 seconds
  • Rest 90 seconds and Repeat Full Circuit 2-3 times

Conclusions

Bodyweight Intervals when done correctly are highly effective and can be performed almost anywhere. Start off with only 1 or 2 circuits and add an extra circuit each week. Only perform this style of high intensity interval training 2 times per week because your body will need time to repair and recover between workouts.

Most of all enjoy these intervals and progress at your own speed safely.

Have you tried any of these interval training exercises? Let me know more below:


Everything You Need to Know About Post Natal Fitness from A-Z

By Greg Brookes

postnatal fitness
Image by Aktiviosio

(This is Guest Post by Angela Hope of Hope Fitness)

A is for Abdominals

The baby belly – top of every new mum’s hit list and the part of their body they most desperately want to fix after pregnancy. Restoring the core is one of the most important steps you should take during the postnatal period and you should start as soon as possible after giving birth.

The abdominal muscles are made up of four layers which need to be strengthened from the inside out. The deepest and most important layer is called the Transverses Abdomis (TvA), which acts like a girdle around your middle. Make this strong and you will be making giant steps towards getting your waist back, having a flat tummy and an improved posture.

The next two layers are the Internal Obliques and External Obliques. These allow you to flex and rotate and give you that much sought-after pinched waistline. Finally we have the Rectus Abdominis, commonly known as the six-pack. These help flex the lower back and also assist breathing.

B is for Baby

Your beautiful little bundle of joy, your reward for 9 months of hard work. Unfortunately it will take at least another 9 months to fix the damage! Don’t use the baby as an excuse though; go out for a walk with the pushchair or put on the Davina DVD. Your little one will love watching you jump around your living room!

Although you may not feel like exercise as your time is so precious and you are very tired, however, exercise will re-energise you, help you sleep better, improve your ability to cope and give you some much needed ‘me’ time.

C is for Caesarean

A c-section is a major abdominal operation so the first 6 weeks after giving birth should be seen as a healing phase. During this time the only exercises you should be doing are pelvic floor exercises (equally important for both c-section and natural deliveries) and when you feel ready, gentle lower tummy exercises.

Under no uncertain terms should you be doing any lifting or impact exercise. Aim to stand up straight during the healing phase as it can become a habit to stoop to protect your stitches. However, the gently flex of standing tall will actually aid healing.

Gradually build up exercise by beginning a light walking programme, starting with 5 minutes and building up to longer walks, preferably at least 30 minutes 3 times per week. Look after yourself during this healing phase and you will be back on your feet quicker. Do the opposite and you can set yourself back weeks.

D is for Diastasis Rectii

Abdominal separation, a fairly common condition of pregnancy and the postnatal period, in which the right and left halves of the Rectus Abdominis muscle spread apart at the body’s mid line fascia, the linea alba. A gap of more than 2cm (approx 2 fingers width) is considered to be a problem but can easily be corrected using the right exercises.

Contrary to popular belief, abdominal crunches will not help you restore your pre-baby tummy and are more likely to make it worse! To help prevent or lessen the severity of diastasis recti it is best to focus on the TvA muscle, the body’s natural girdle. Activate this muscle by breathing and pulling your tummy button towards your spine. Continue to hold while breathing out.

E is for Energy

A good balance of regular exercise, healthy eating and plenty of rest will help keep your energy levels up. The right exercise can energise you, make you sleep better and help you to make better food choices. Look after your baby by looking after yourself.

F is for Feeding

If you are breast-feeding, make sure you feed your baby before exercising so you are more comfortable. It has also been shown that vigorous exercise can mean a build up of lactic acid in your milk so wait 20 minutes after exercise before feeding again. This won’t effect your baby at all, it may just make your milk taste funny!

G is for Glutes

The big muscles in your buttocks… the rock that holds your pelvis, hips and abdominals together. Often these muscles are very neglected as we spend a lot of time sitting on them! Allow these muscles to work properly and they are a vital component to your whole body strength, particularly your back.

H is for Hips

During pregnancy the hip flexor muscles (at the front of the hips) become tight due to the postural changes in your body – the growing uterus causes the pelvis to tip forwards. In addition, the body produces the hormone Relaxin, which softens the ligaments in your pelvis and other joints, to help you to give birth. This makes the whole pelvic girdle unstable and can often result in pain around the hips joints and pelvis.

After pregnancy it is important to remobilise the hips and focus on stretching out the tight hip flexor muscles.

I is for Iron

Once you have given birth, your iron requirements are greatly reduced. However, during this important rehabilitation stage it is important that your iron intake is adequate, as lack of iron can make you tired and more susceptible to postnatal depression.

Try and eat plenty of iron-rich food such as red meat, fish and poultry. Iron is also in green leafy vegetables and pulses although it is harder for the body to absorb. Drink a glass of orange juice, high in Vitamin C, with a meal to help absorb more iron.

J is for Jubblies

Breasts usually increase by at least one cup size during pregnancy and postnatally, especially if you are breast-feeding. Because your breasts will be much heavier, it is vitally important that you wear a supportive bra, especially when exercising. A sports bra specifically designed for exercising will give you the support you need and minimise discomfort.

K is for Kegels

Everyone should be doing their pelvic floor exercises, none more so than postnatal females. During labour the pelvic floor muscles will have become very overstretched and exercises to get these back in shape should be the first thing you do after giving birth. They will not only help with incontinence and hemorrhoids but also aid your postnatal recovery.

Find a trigger in your everyday life that will help you to remember to do them; boiling the kettle, feeding your baby, brushing your teeth.

L is for Lower Back

Many postnatal females have lower back problems beyond pregnancy, usually due to the hormone relaxin that is still in the body causing instability in the ligaments and joints around the hips and pelvis in addition to weakness in the core and glute muscles.

Your posture takes a while to get back to normal and you spend a lot of time lifting; the baby, a car seat, a pushchair, a toddler, all of which can exasperate a problem. In most cases exercise can be used to both alleviate these aches and pains and also restrengthen the weak muscles over time. Consider your posture at all times when walking and lifting and if possible treat yourself to a massage to soothe the aches and pains.

M is for Mobility

Keeping mobile keeps you young. We spend so much of our time sitting that most of us are unable to move properly. For example, during pregnancy, the hip flexor muscles can become very tight due to the extra weight in the pelvis. Here we often find that the lower back compensates for this, causing pain and discomfort. It is important to spend a little time each day working your joints through a full range of motion. Start at the top with the neck and work down to the ankles.

N is for Nutrition

“You can’t out exercise a bad diet”. Most of us know what we should and shouldn’t be eating but most of us find this difficult to adhere to. However, small changes can make a big difference. It’s difficult when you are tired and you have a baby to look after to remember to eat properly but all it takes is a little preparation and some forward planning.

Always start with a filling and nutritious breakfast, this will set you up for the whole day and prevent hunger later on. Drink at least two litres of water daily. Eat as many fresh, natural products as possible daily; fruit, vegetables, meat, eggs, fish.

Eat little or no refined carbohydrates; white sugar, white bread, white pasta, cakes, biscuits. Eat more wholegrains; brown rice, brown bread, oats. Cut down caffeine; no more than three cups of tea or coffee a day. Cut down alcohol; no more than two units (one drink) per week.

O is for h2O

Water is the one thing that we can not live without. Keeping well-hydrated is one of the most, THE MOST, important things you should be doing for yourself. Two litres of plain, fresh water per day should be your aim (preferably filtered or bottled).

It is difficult at first, you will probably find it a struggle to drink that much water during the day, with frequent trips to the WC! However, it does get easier as it becomes a habit. Aim to drink a glass first thing in the morning before anything else.

P is for Plank

The Plank exercise is a static exercise that works your whole core, particularly the deep stabilising muscles. You use your arms to raise yourself off the floor and hold the whole body straight and rigid, like a plank of wood. You can do it anywhere, you don’t need any equipment and it only takes a minute. What’s more, it is more effective than sit-ups and crunches because these work only the superficial abdominal muscles.

There are three variations of the plank that target different areas of the core; the basic plank, the side plank and the sky diver. The plank is highly effective core exercise however, do not attempt the plank if; you have diastasis recti, are still recovering from a c-section or have lower back problems.

Q is for Q Angle

This is the angle between your hip and your knee. A “normal” Q angle is 14cm for males and 17cm for females. Females usually have a higher Q angle due to their naturally wider pelvis. Your Q Angle will increase during pregnancy as your hips widen to give birth and may never return to their pre-pregnancy state.

Unfortunately a higher Q angle can often result in knee pain. This is why it is important that a postnatal exercise programme redresses the balance of pregnancy and post-pregnancy induced changes, and restore the ‘ideal’ posture. It is essential to learn how to utilise the the deep stabiliser muscles in the core and re-align the body through the strength and stretch of opposing muscles.

R is for Relaxation

Relaxation is an important part of good health, vital for maintaining clear-mindedness and overall wellness. Make time for it every day, and develop a relaxation technique that deeply relaxes you quickly. Find a way to make some ‘me’ time every day, whether it is a hot bath, an exercise or yoga session, reading a book or magazine or just a quiet lay down.

S is for Squats

Love them or hate them they are a great exercise for working your whole body, primarily the big muscles in your thighs, hips and bottom. Squats strengthen your knees and ankles and all the supporting tendons connecting them. They help your balance and keep you mobile.

Squats also strengthen your core as both the muscles of your abdomen and your lower back are utilised to hold and balance the weight throughout the movement. This strengthens both your posture and balance, as well as assists your body in performing everyday physical tasks. Finally, if the big muscles in your body are strong and lean, this increases your metabolism so you burn more calories at rest.

T is for Transversus Abdomnis

The Transversus Abdomnis (or TvA for short) is the deepest lying abdominal muscle and probably the most important. Forget the 6 pack, this is just the icing on the cake. Make the TvA strong and you will have that flat tummy and pinched waist you always dreamed of. The TvA is a natural “girdle” around your middle and supports the abdomen and lower back.

If you don’t know where your TvA is or what it feels like to contract it then try this. As you breathe in, pull your tummy button towards your spine. As you breathe out, continue to hold your tummy in. This is your TvA working. Repeat this exercise throughout the day especially when you are walking or lifting.

U is for Unfit

You may be feeling unfit after having a baby but actually pregnancy has an amazing training effect on your cardiovascular system. Your heart and lungs have been worked out really hard to grow and support your little one for 9 months. The amount of blood circulating around your body increases, increasing blood pressure and resting heart rate, making the heart work harder.

Your lungs will have been taking in more air per breath to assist the heart and send more oxygenated blood around the body. This is why, with the right balance of exercise and nutrition, you can take advantage of this training effect and be fitter and healthier than ever before.

V is for V Sits

Once you have restored a base level of strength back in your core, try this simple but effective exercise for toning the abdominals, the obliques and the lower back muscles. V Sits are very physically demanding but done regularly can reduce fat and increase core strength in your torso. Begin in a seated position, contract your abdominal muscles and core, and lift your legs up to a 45-degree angle.

Reach your arms straight forward and maintain good core posture and a strong spine. Hold this “V” position for several seconds to begin. As you get stronger, hold the position longer. Return to your starting position slowly. Just before you reach the floor, stop and hold the position for a few seconds. Repeat this entire movement several times.

W is for Walking

Simply the best postnatal exercise. It’s free, it’s safe, you can take baby with you and the fresh air will do you both good. As soon as you feel able to after giving birth, begin by doing a gentle daily 10 minute walk, gradually building up to doing three 30 minute power walks per week. For it to be really effective you need to make sure you get the heart pumping.

The best way to do this is to walk up a hill. Not only will you really get that heart rate up, which will burn fat and tone that wobbly bottom, but it will also help to strengthen the muscles surrounding the pelvis that are still weak from pregnancy. How about trying a Buggy Workout class and join like-minded mums?

X is for X Training

Variety is the spice of life as they say so why not add something different to your fitness regime. During the postnatal phase make sure you go for an activity that is low impact, until you have built up strength in your hips and pelvis once again. Swimming is an excellent form of postnatal exercise as there is no stress on your joints. When you’re feeling a bit stronger why not try Zumba. Check out your local classes.

Y is for Yoga & Pilates

Both these type of classes restore the strength of the abdominal muscles and the pelvic floor muscles, help to reduce fatigue, energise the body and calm the mind, improve posture and open the chest, strengthen the back and shoulders and re-establish core stability.

Above all else they offer a rare chance for peace, quiet and to truly relax! Most classes can be easily adapted for postnatal but make sure you let the instructor know that you are. Better still, do a class specifically aimed at postnatal. Try and find a class with fewer numbers so that you get more one-to-one attention from the instructor.

A good yoga or Pilates class with an experienced teacher is an excellent form of postnatal exercise however, if done incorrectly can do more harm than good.

Z is for ZZZ’s

Sleep. One thing you need most for your health and well-being but one thing you probably lack most. It is important for your postnatal recovery that you get enough, good quality sleep to ensure that your body balances out fat-burning hormones, reduces stress and levels of cortisol, which make the body cling to fat.

Not sleeping properly disrupts the hormone leptin, which controls appetite and metabolism, so when you are sleep-deprived you will tend to eat more. Unfortunately when babies are born they take a few weeks, months, maybe even years to learn to sleep through the whole night. Try to stock up on as much sleep as possible, taking 15 power naps during the day and making sure you get an early night.

For more about Angela’s services visit Hope Fitness


Is it Time to Go Against the Grain?

By Greg Brookes

What I’m about to reveal about grains is based upon empirical evidence.

Nothing has had a bigger impact on my life, my wife’s, my friends and my clients lives than grains.

If there is one major piece of nutritional advice that you need to seriously take note of then this one about grains is it!

OK, lets dive into it…

The problem with glutenWhat are Grains?

Grains are seeds. Examples include:

  • Corn (yes it’s a grain)
  • Wheat
  • Rye
  • Millet
  • Barley
  • Spelt

Grains are excellent for business because they have a long life and store well, unlike fresh vegetables.

It is important to realise that we have been living and evolving without grains for millions of years. In terms of human evolution grains are a relatively new addition to our diet.

What is Wrong with Grains?

# 1 – Heavily Sprayed With Chemicals

Similar to many other non organic foods, grains are sprayed with Pesticides, Herbicides, and other chemicals to keep bugs and insects from destroying the crops. As I’ve mentioned in other articles ingesting poisons from pesticides takes a lot of nutrients from the body as you try to neutalise all those ill effects.

Lets put it another way:

“If someone handed you a small vial of poison every morning to go with your breakfast would you drink it?”

# 2 – Grains are Highly Processed

Processed Hot dogThere are 3 main components of a grain, for example a wheat grain contains:

  1. The Bran (The outer layer, hard and full of Fibre and Nutrients)
  2. The Germ (Nutrient Rich Embryo that sprouts)
  3. The Endosperm (Mostly Starch and makes up most of the grain)

Unfortunately when grains are processed both the Bran and the Germ are removed leaving just the Endosperm or the part made up of mostly starch, which is sugar!

The food industry now knowingly having removed all the nutrients from the grain try to put the nutrients back into the grain by adding synthetic vitamins.

As you know, we come from nature and so don’t like things that don’t come from nature. Digesting synthetic vitamins takes more nutrients from the body as it struggles to digest them.

# 3 – High in Carbohydrates

As you can see from above, the majority of the grain is made up of starch, which is a white tasteless sugar (glucose to be more precise). If the grain is processed then almost 100% of the grain is starch.

So put another way White Flour is pure sugar! Whole Wheat Flour has less sugar because it includes all 3 parts of the grain but it is still high in sugar.

Sugar is our worst enemy; it increases demands on our hormonal system as insulin fights to maintain blood sugar equilibrium, it damages blood vessels and arteries, and it forces the body to store fat in our adipose tissue.

# 4 – Very Addictive

Grains contain Exorphins which are morphine like compounds which basically get us excited and make grains very addictive, so one reason why we crave grains is because of the Exorphins. You can read more on Exorphins and Food Heroin in this excellent article by Eric Yarnell

Grains are also addictive due to their sugar content. When we eat grains it spikes our blood sugar levels that leaves us feeling energised, alert and happy. But the highs never last too long and as blood sugar levels drop the cravings begin.

The higher we climb the harder we fall. This starts off a vicious cycle of eating grain based foods like breads, cakes, cookies to lift us up and then getting dropped like a stone as our blood sugar crashes.

# 5 – Causes Mineral Deficiency

Phytic acid is in a lot of grains. This specific acid binds with the minerals in our body like Calcium and Zinc and stops our body from absorbing them. Phytic Acid also helps to eliminate these minerals from our system.

So if you eat a lot of grains, then it’s very possible that you’re also mineral deficient.

One way to get around the problems of Phytic Acid is to ferment, sprout or soak the grains. That’s why I always recommend to clients if they can eat things like oats, for example, to soak them overnight because that eliminates or practically removes most of the Phytic Acid problem.

So a little tip for you: soak, ferment or sprout as much as possible.

# 6 – Gluten Sensitivity & Intolerance

Gluten (Latin for Glue) is a protein contained in grains like Wheat, Barley and Rye. Gluten adds a gluey, fluffy texture to foods. So the lighter and fluffier your bread or cake the more Gluten it usually contains. Processing is often used to increase the Gluten content because everyone wants a light fluffy cake right?

Unfortunately, the gluey structure of Gluten does not generally agree with our digestive system and most people now suffer from some kind of Gluten Sensitivity without realising it.

Gluten Sensitivity

Sensitivity to Gluten causes an immune reaction, that can show its ugly head in many different areas. A lot of people associate Gluten Sensitivity with just bloated bellies, but it can affect you from head to toe.

Gluten Sensitivity can:

  • Block blood into the brain
  • Cause skin problems
  • Respiratory problems
  • Fatigue
  • Depression
  • Mental disorders
  • Physical disorders

“In fact, the New England Medical Journal associated 55 different diseases with gluten sensitivity”

Celiac Disease

One of the most extreme diseases caused by gluten sensitivity is called Celiac Disease. Those suffering from Celiac disease have destroyed their Microvilli and Villi in their small intestines.

The small intestines main job is the absorption of nutrients found in food. In our small intestines, we have tiny needles called Microvilli and Villi. These little fingers run all around our intestines and increase the surface area.

If you suffer from Celiac disease then your Villi and Microvilli will have atrophied, and been destroyed. The small intestines become smooth with no Villi. When you have little or no Villi then absorption of nutrients from foods becomes very difficult.

The only conclusive way to check for Celiac Disease is by taking a biopsy of the small intestine and examining the Villi and Microvilli content. No Villi means you have Celiac Disease.

Leaky Gut Syndrome

Damage to the small intestine through excess consumption of gluten can also lead to leaky gut syndrome.

As the cell walls of the small intestine become irritated and damaged greater permeability can occur. The result is foreign bodies, like badly digested proteins, that can pass through the cell wall and into the blood stream. These foreign invaders are then attacked by the immune system resulting in food sensitivities and allergies, they can also cause autoimmune disorders of the body.

Gluten is Everywhere

So you may be thinking about avoiding Gluten but unfortunately gluten is in more things than you may think.

Gluten causes fluffiness and stickiness so you can find it in:

  • Lipsticks
  • Stamps and Envelope Adhesives
  • Sausages and Hamburgers as Fillers
  • Pasta
  • Bread
  • Shampoo

It’s used in everything.

It could be time to become a Gluten detective, like me!

Gluten Cross Contamination

Another problem with Gluten is the wide spread cross contamination within factory’s.

Take oats for example, that don’t naturally contain gluten. But if the oats are processed in the same factory as something that contains gluten, like wheat, then the oats can become cross contaminated.

It only takes a miniscule amount of gluten to cause a reaction in your body if you’re sensitive to gluten. Don’t think you need to eat tons of flour or gluten to have a problem. Simply using a lipstick or shampoo that has gluten in it can cause a problem.

Don’t think that you cannot absorb Gluten through the skin because you can. Gluten will permeate the skin just like Steroid Creams or Nicotine Patches do!

Cross-reactivity

If you are sensitive to gluten then cross-reactivity can also be a problem. With cross reactivity the body starts to associate similar things to gluten and react to those as well. For example if you drink your tea with a biscuit then the Gluten from the biscuit can become associated with the tea and caffeine.

Cup of espresso

One of the most common cross-reactivity foods is Casein which is the protein in dairy products. Think Cereal with Milk.

So often when people eat dairy products, they’ll have a reaction even though there’s no gluten in the food because there has been cross-reactivity from the gluten.

So I always insist that my clients avoid gluten, but also avoid dairy as well just to make sure. Research shows that most people that have got gluten issues also have dairy issues as well.

Cross reactivity foods include:

  • Dairy
  • Oats
  • Coffee
  • Tea

How to Deal with Grains

As you can see from the list above there are many reasons not to eat grains. Grains are one problem and then grains that contain Gluten are an even bigger problem.

Not only are most grains low in nutrients but they are high in sugars (cause weight gain), chemicals (take nutrients from your body) and have the potential of causing a whole host of diseases.

Lets Take Action!

Here’s my 3 step plan that you can try to first determine your reaction to Gluten:

Step # 1 – Remove all Gluten for 30 days

If you want to know if you have Gluten Sensitivity issues and I’m sorry to say that most people do, then remove Gluten from your diet for 30 days.

This means going totally Gluten Free, so avoid all foods that contain Gluten such as:

  • Cereals
  • Bread
  • Pasta
  • Sausages and Burgers
  • Beers

Most supermarkets now have a Gluten Free section and most foods have a requirement to list whether they contain Gluten. So become a Gluten Detective and keep an eye out!

Go here for a good list of Foods Containing Gluten

Step # 2 – Introduce a Small Amount of Gluten

Now comes the real test. If you have been strict and avoided Gluten for the complete 30 days then I can guarantee you will have lost weight and feel 10 times better.

But, to see if you do have Gluten Sensitivity issues try eating a small portion of grains that contain gluten (a slice of bread for example) and then gauge your body’s reaction.

Look out for the following symptoms:

  • Bloating and Cramping
  • Fatigue and lack of Energy
  • Skin Irritations
  • Lack of positivity
  • Headaches and Clouded Thinking

If you experience any of the above or indeed any negative effects then chances are you’ve got Gluten Sensitivity Issues.

Step # 3 – Make Your Choice

Now you have a clear choice. If you reacted to Gluten then you need to pay attention, fast!

Gluten is simply not for you and you will need to avoid it as much as possible. If you don’t pay attention then disease will follow. It may sound drastic but you may only be a few steps away from Celiac Disease and then a whole host of other problems.

If you didn’t react to the Gluten then you can do what I do and that is avoid grains as much as possible but treat yourself every now and then.

For example I may have a Croissant on the weekends. But to be honest with you, there are so many Gluten free options out there that you never need to go without.

Try baking your own treats: Gluten Free Brownies made with 90% Dark Organic Chocolate are heavenly 🙂

In Conclusion

We all eat far too many grains. They have become a staple choice for breakfast (Toast), for Lunch (Sandwiches), for Dinner (Pasta), and for Treats (Cakes & Biscuits).

Our survival is not dependent on grains and as you can see they don’t really offer a nutrient rich food. Non organic grains are covered with chemicals that draws existing nutrients from the body. Grains are high in starch, which means high in sugar and not only cause fat storage but hormonal issues too. Those struggling with blood sugar issues like diabetes should certainly be very weary of grains.

Finally, many grains contain Gluten that has found its way into almost all prepackaged foods. Gluten Sensitivity is on the rise and many of use suffer with Gluten issues without even knowing it.

I urge everyone to take part in my 3 Step process above and witness for yourself the huge impact that eating no grains can have on your health.


Are you willing to give up Grains for 30 days?

What is Your Greatest Pain?

By Greg Brookes

what is your greatest pain
What is Your Greatest Pain? Image by Ricky David


It’s the beginning of 2013 and I mean to start the way I mean to carry on!

My main goal and focus for this year is to help you, the reader of this blog.

So I have a very important question for you:

What is Your Greatest Pain?

You know, what is that one thing preventing you from being fit, healthy, slim and happy in 2013?

It could be that you lack motivation to exercise and eat right, you may feel overwhelmed with media information, perhaps you’re tired of failing or just need a proper plan and supervision.

If you don’t identify what it is that is holding you back from achieving your goals then you are always going to struggle. 

Let me know in the comments section below exactly what is stopping you and together we’ll work on a solution, OK?

So once again: What is Your Greatest Pain?

Let me know your Comments below:

  • « Go to Previous Page
  • Page 1
  • Page 2
  • Page 3
  • Page 4
  • Page 5
  • Page 6
  • Go to Next Page »
GB Personal Training Ltd

-

Greg Brookes is the founder of GB Personal Training Ltd and KettlebellsWorkouts.com. He has been featured in Men's Health, Women's Fitness, Men's Fitness, and Health & Fitness Magazine, where he wrote a monthly column. He has also been featured in the majority of UK national newspapers. Labelled as "the trainer to the trainers" he delivers seminars and a regular newsletter to help Personal Trainers improve their skills and achieve better results for their clients. Continue reading

Top Articles

  • 41 Full Body Medicine Ball Exercises
  • 500 Bodyweight Workout Challenge
  • Complete Guide to Kettlebell Training
  • Why Your Hamstrings are Tight
  • Top 13 Functional Training Exercises
  • 17 Bodyweight Cardio Exercises
  • 13 Hip Mobility Exercises to Ease Lower Back
  • 7 Popular Exercises You Must Avoid
  • How to Perform 100 Push Ups
  • 33 Kettlebell Exercises
  • 12 Exercises to Build Better Buttocks
  • 7 Foods That Have More Calcium Than Milk
  • Top 5 Kettlebell Exercises for Interval Training
  • Your Complete Guide to Warming Up

Kettlebell Programs

Kettlebell Programs
  • Workouts
  • About
  • Blog
Kettlebell Workouts | Kettlebell Exercises | Privacy Policy | Terms| Disclaimer

Copyright © 2026 GB Personal Training Ltd . All rights reserved.